Repairing a Whirlpool washing machine
I was at home when I suddenly smelled burnt electronics. This is never a good sign, mostly because I was unable to pinpoint the source right away. Afraid of something slowly smoldering and catching fire I started going over to the breaker box to pull the main breaker for my whole flat - you know, just in case. On my way there I noticed my washing machine wasn't spinning anymore and all the LEDs were dark. So I investigated this first, and, surely enough, it broke :(
I've had this machine since 2011 and it never caused me any major problems, so this was quite sad. Anyway, I wanted to try to fix it so I starterd diassembling the machine. Besides the motor, pumps and heater element the machine contains one main circuit board which controls everything and an auxiliary board with the LED display and buttons. I took out the main board which is a Whirlpool L1373 "domino controller", and could already see that something wasn't quite right: (Reminder: Always take pictures how everything was plugged in before you take it apart!)
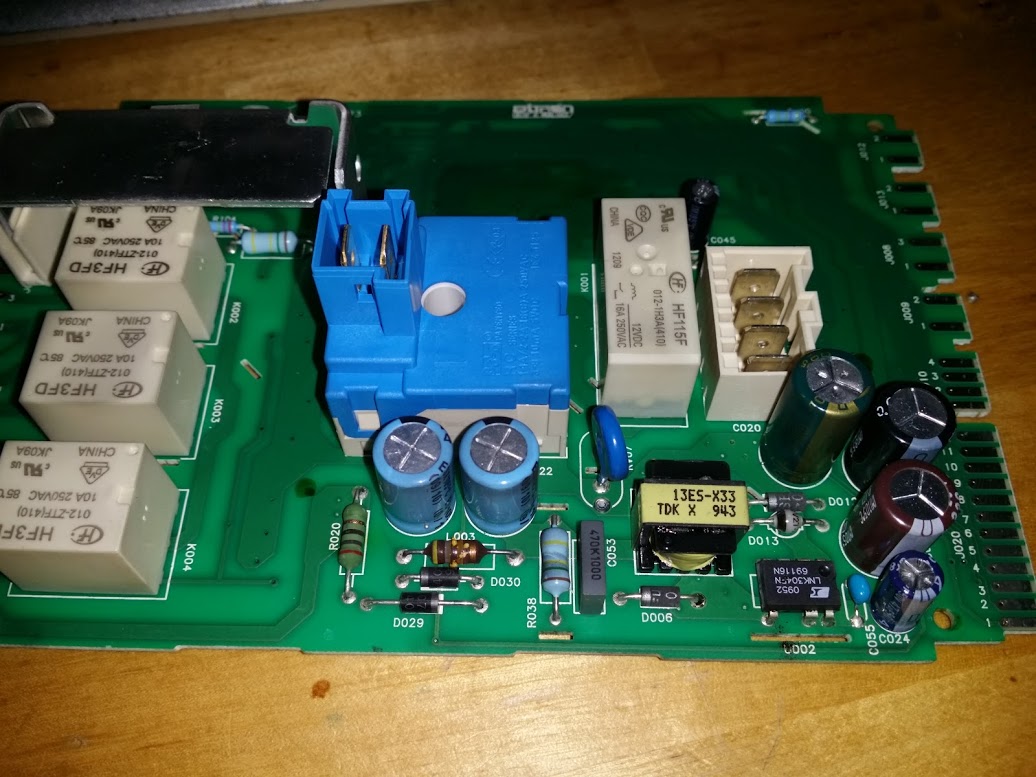
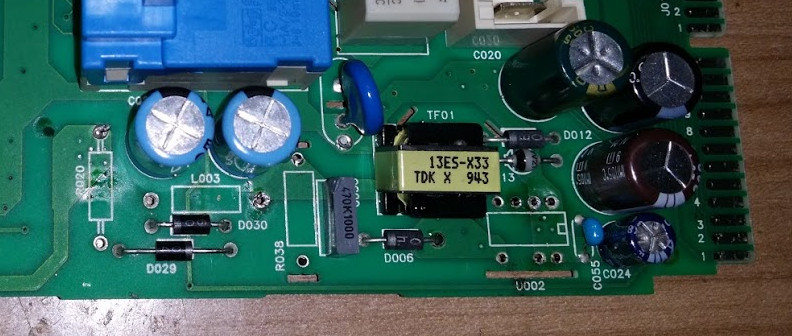
The inductor L003 seems to be a bit sick and has to be replaced. Fortunately the circuit board isn't charred, even the rest of the component seem OK (except for the smell coming off the board). A quick check with the multimeter showed me that R020 went open circuit. It's a fusable resistor so it probably indicates that there are more issues with the board. The diodes are still doing their thing, the caps can hold a charge and the transformer is still connected the way it should be. Hm .. maybe the chip has gone wonky? Difficult to test, but at 70 Cents a piece it's easier to just replace it with a new one.
Though some digging around online I found the schematic for the L1373 as a PDF. It took me quite a while to find it so I'm making it available here. For this repair it wouldn't be really needed, but schematics always help!
In the end I decided to replace R020 (broken), R038 (looks a bit weird), L003 (broken) and the IC (most likely the culprit). All the components are easy to find at any electronics distributor. So, out with the old:
And in with the new:
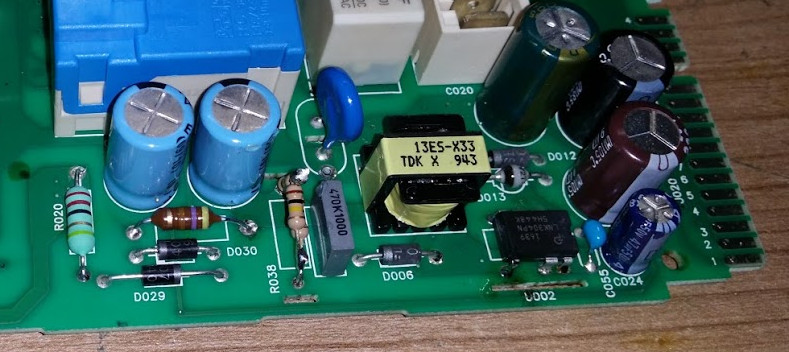
Not my best soldering job, the conformal coating makes soldering a bit difficult. Also I didn't have a 150K resistor which is why I wired a 100K in series with 2x100K parallel. After the soldering I hooked the board up to my 230V isolation transformer with a lightbulb in series, turned the knob with a screwdriver, and some of the LEDs lit up. No magic smoke, yay :)
So I was able take the board back home and put it back into the machine. Everything seems to be working fine - and I only spent around 15€ in parts and express shipping.
Add new comment